
Quiet, Fast, Perfect Pan-Tilt Camera or Turret Base
Almost every Raspberry Pi enthusiast tries their hand at motion at some point—whether it's moving, sliding, or rotating objects. The most straightforward and economical method usually involves using servos. However, it doesn't take long to realize that servos are noisy, imprecise, and quickly prone to failure.
In this project, we demonstrate how, with the use of incredibly fast, powerful, and near-silent BLDC Gimbal Motors, we can create a camera that tracks color, objects, and even the user's face.
Advantages of BLDC Gimbal Motors:
- Accuracy to a fraction of a degree
- Amazing speed (consider how quickly such motors spin in drones)
- Silent operation (at low revolutions, they are practically noiseless)
- Reliability (with no gears, gearboxes, friction, or jolts - there's nothing to break down)
- Significant power (dependent on motor size)
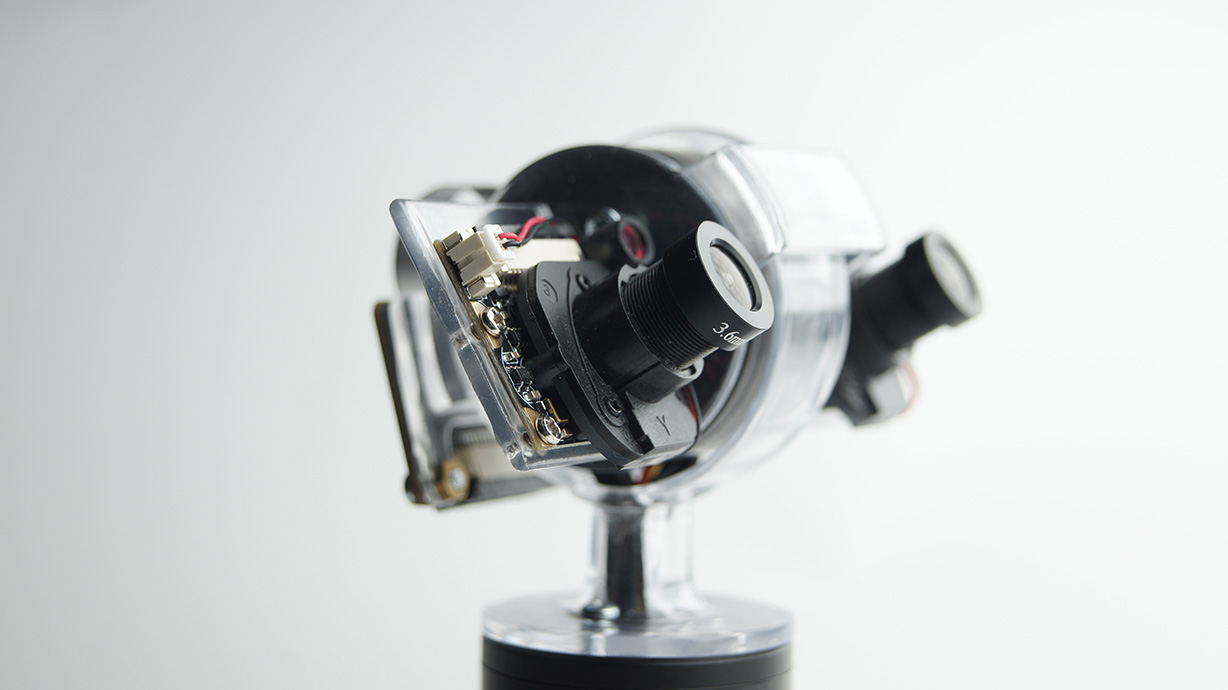
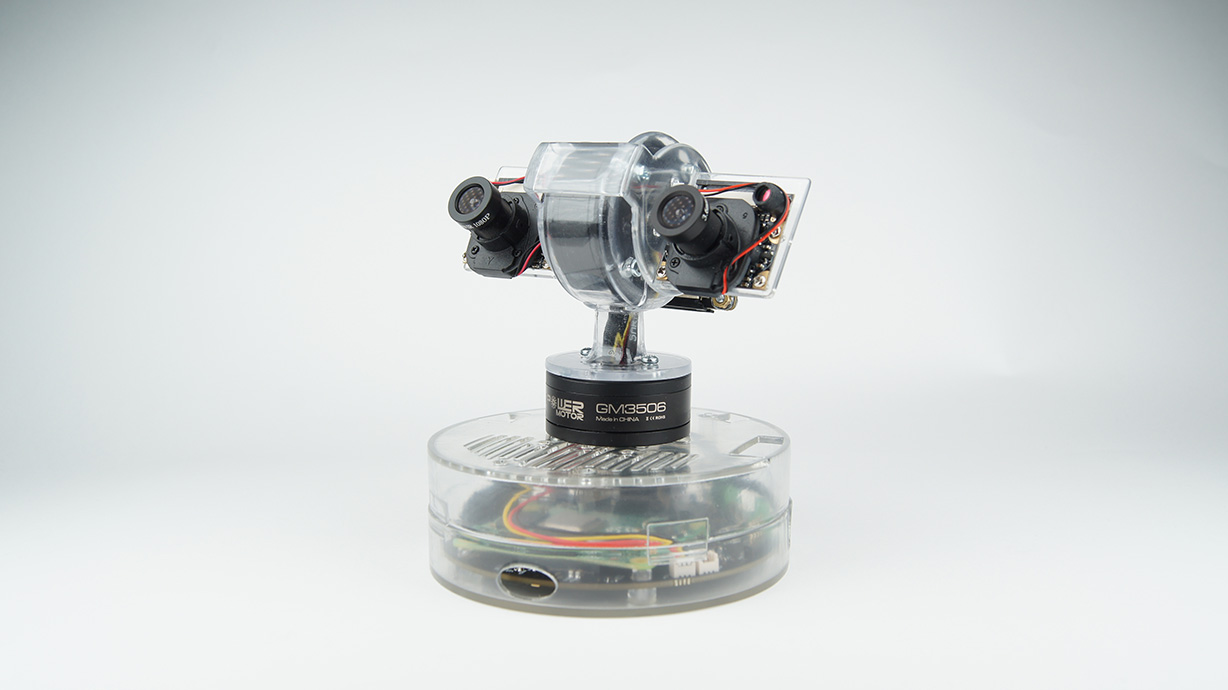
We utilize the open-source SaraKIT, equipped with drivers for precise control of two BLDC motors used in this setup. One motor is responsible for vertical camera movement, while the other takes care of horizontal movement.
For image recognition, color tracking, object tracking, and face tracking, we primarily rely on OpenCV libraries and ready-to-use functions for BLDC motor drivers—all of which are freely available in our GitHub repository.
👉 DIY: 3D Print Your Own SetupGood news for DIY enthusiasts! We're offering STL files so you can 3D print your own camera housing or mounts for one or two cameras. Dual-camera setups are ideal for 3D image analysis or depth detection.
Prerequisites
Ensure you have the following installed on your system:
- Python 3.x
- getting starter software: https://sarakit.saraai.com/getting-started/software
and
- 1 x SaraKIT
- 2 x Gimbal Motors e.g., GM3506
- 1 x Encoder e.g., AS5048A
- 1 x Raspberry Pi Camera
- printed or purchased Pan-Tilt casing (in the resources you will find ready-made files needed to emboss the casing)
Example of use: Face Tracking
To utilize SaraKIT for face analysis, follow these steps:
- Clone repository, compile the code by running the command 'make' and execute the program:
git clone https://github.com/SaraEye/SaraKIT-Face-Tracking-MediaPipe-Raspberry-Pi-64bit FaceTracking cd FaceTracking make ./FaceTracking - The program captures frames from the camera, processes them, and sends the output.
- Preview the operation in your web browser by accessing the Raspberry Pi's IP address followed by port 7777 (e.g., http://raspberrypi:7777/ or http://192.168.1.16:7777).
If you have the Linux Desktop version and want to display the image from the camera in a window, change this line:
init_viewer(ViewMode::Camera0,ViewMode::Processed, 1, true, false); - The browser preview displays one or two images side by side, where the content of each image can be customized. By default, the left image shows the camera preview, while the right image displays the detected face along with face landmarks. Refer to the video below for a similar visualization.
Both the standard Raspberry Pi MMAL functions and OpenCV (slightly slower) functions can be used to capture frames from the camera.
#include <iostream>
#include <signal.h>
#include <stdio.h>
#include <math.h>
#include <arm_neon.h>
#include "unistd.h"

#include "struct.hpp"
#include "lib/viewer/viewer.hpp"
#include "lib/mediapipe/Mediapipe.hpp"
#include "lib/SaraKIT/devices.hpp"

using namespace std;

cv::Mat frame0, frame0Gray, frame0GrayHalf, frame0GrayHalfEdge; // cam0
cv::Mat frame1, frame1Gray, frame1GrayHalf, frame1GrayHalfEdge; // cam1
cv::Mat imgProcessed;

ViewerStatus viewStatus;

//ctrl-c
void ctrlc_handler(sig_atomic_t s){
    printf("\nCaught signal %d\n",s);
    BLDCMotor_MoveStop(0);
    BLDCMotor_MoveStop(1);
    control_c=true;
    exit(1);
}

void moveCamToRect(cv::Rect faceRect){
    auto center=(faceRect.tl()+faceRect.br())/2;
    float angle_x, angle_y;
    angle_scale = (124.0 / camwidth); //(for cam 62 degree)

    int setpoint_x_rel = (center.x - (camwidth >> 1)) >> 1;
    angle_x = setpoint_x_rel * angle_scale * (0.30 + ((1 - (faceRect.width) / camwidth)) / 10);

    int setpoint_y_rel = (center.y - (camheight >> 1)) >> 1;
    angle_y = setpoint_y_rel * angle_scale * (0.30 + ((1 - (faceRect.height) / camheight)) / 10);

    if (abs(angle_x)<0.5)
        angle_x=0;
    if (abs(angle_y)<0.5)
        angle_y=0;
    if (control_c!=true){
        //printf("x:%.2f y:%.2f\n",angle_x,angle_y);
        BLDCMotor_MoveByAngle(1, angle_x, 1, 20, true);
        BLDCMotor_MoveByAngle(0, angle_y, 5, 20, true);
    }
}

int main(int argc, char** argv){
    signal(SIGINT,ctrlc_handler);

	camwidth=320;
	camheight=240;

    imgProcessed=cv::Mat(camheight, camwidth, CV_8UC3);

    init_camera(0, camwidth, camheight, false, false, true, true, true);
    //init_camera(1, camwidth, camheight, false, camOpenCV, true, true, true);
    sleepms(200);

    //init_viewer(ViewMode::Camera0, ViewMode::Camera1, 1, false, true);
    init_viewer(ViewMode::Camera0,ViewMode::Processed);

    //set gimbals pole
    BLDCMotor_PolePairs(0,11);
    BLDCMotor_PolePairs(1,11);

    //run once, get info ()
    //Use InitFoc only if you use an encoder
    BLDCMotor_InitFOC(0,0,0,0);
    //and paste below
    //BLDCMotor_InitFOC(0, 0, -1, 3.63);

    BLDCMotor_On(0,true);
    BLDCMotor_On(1,true);

    //the settings below depend on the impact on vibrations,
    //depends on the weight of the engine and what the engine is carrying
    BLDCMotor_PIDVelocity(0, 0.4, 20, 0, 1000);
    BLDCMotor_PIDVelocity(1, 5, 20, 0, 0);
    //BLDCMotor_PIDVelocity(1, 10, 10, 0, 1000);
    BLDCMotor_IdleTorque(1, 0, 2500);

    std::vector<std::vector<cv::Point2f>> faceLandmarks;
    std::vector<mpface::Face> faces;

    //for Face Mesh
    MediapipeFaceMesh mfm;
    FrameResultSynchroniser meshSync(100);

    //for Face Detect
    //MediapipeFace mf;
    //FrameResultSynchroniser faceSync(100);

    int iz=0;
    while (_SPICheck()==false && iz<10) {
        iz++;
        sleepms(100);
    }

    printf("Start Loop\n");
    do {
        // Get frame to frame,frameGray,frameGrayHalf
        if (GetFrame()==0) { //GetFrame()==1 (new frame from cam0 ==1, ==2 from cam1, ==3 from cam0 & cam 1)

            //here you have time to do anything
            sleepms(1);
            continue;
        }

        std::vector<std::vector<cv::Point2f>> faceLandmarks;
        faces.clear();

        //face Mesh
        meshSync.pushFrame(mfm.pushFrame(frame0),frame0);
        int resm=meshSync.getFrameFromId(mfm.getFaceMesh(faceLandmarks),imgProcessed);

        if (resm&&faceLandmarks.size()) {
            mfm.drawFaceMesh(imgProcessed,faceLandmarks);
            std::vector<cv::Rect> facesRects;
            mfm.getFacesRectsFromLandmarks(faceLandmarks,facesRects);
            mfm.drawFacesRects(imgProcessed,facesRects,greenScalar);
            tick2on=true;
            moveCamToRect(facesRects[0]);
        }

        //face Detect
        // faceSync.pushFrame(mf.pushFrame(frame0),frame0);
        // int resf=faceSync.getFrameFromId(mf.getFaces(faces),imgProcessed);

        // if(resf&&faces.size()){
        //     mf.drawFacesRects(imgProcessed,faces);
        //     cv::Rect ff=faces[0].getBoundingBox();
        //     tick2on=true;
        // }

        viewStatus = viewer_refresh();

    } while (viewStatus != ViewerStatus::Exit && control_c != true);
    closing_function(0);
    return 1;
}
SaraEye dual camera AI assistant. Two BLDC motors enable the head to be moved left and right as well as up and down.
You can find C++ and Python code for Raspberry Pi4 in the
SaraKIT Github repository:
https://github.com/SaraEye
https://github.com/SaraEye/SaraKIT-Face-Tracking-MediaPipe-Raspberry-Pi-64bit